Gmail is the best thing that happened since sliced bread. That may sound like an over statement. If you really think about it, Gmail definitely has changed the way how we manage emails. Without Gmail, I cannot imagine processing 100′s of emails effectively every day without breaking a sweat.
In this article let us review 15 awesome Gmail tips and tricks that will help you to manage your emails effectively.
The cure is Gmail’s Attach Alerter. If you have the word ‘attach’ in the mail content, and did not attach anything, you will be alerted by Gmail before sending that email. To enable this feature, do the following.

Fig: Gmail Attachment Reminder

Fig: Setup email automatic forwarding
You also have the option of deciding what to do with the emails in the original account after forwarding it. Following are the three options available.
Not having to organize emails in a folder is a total freedom. Labels are like tags. You can create multiple labels and attach it to emails. Later it becomes easier for you to retrieve emails. If you are used to delicious bookmarking, you’ll have no problem using the Gmail labels effectively.

Fig: Use Gmail Labels to organize emails
Types of messages in Gmail
“is:starred”, “is:unread”, “is:read” and “is:chat” will search for the messages that are starred, unread, read and chat messages respectively.
For Example, the following will give you the list of starred messages in Inbox folder.
You can search messages based on either-or condition. For example, following search gives the message which has ramesh as recipient or sender, after 2009/01/01
Note: OR is case sensitive and must be in upper case.
You can also use advanced options in search by clicking ‘Show search option’ that is located next to the Gmail search box. Advanced search provides search based on the following:
By Default, Gmail highlights the searched words in search results. i.e When you do a search, Gmail returns a list of messages matching the search criteria. You can select any of these messages to view, and Gmail automatically highlights the word/words you searched for.

Fig: Gmail turn on or off highlighting
Sometimes, you might feel it’s distracting. You have the ability to turn OFF/ON the highlighting by clicking on the “Turn off Highlighting” link on the top right column. Clicking it again turns highlighting back immediately without reloading the page.
You cannot attach an executable file like a normal file. Gmail will display the error message – “FILE is an executable file. For security reasons, Gmail does not allow you to send this type of file”.
To overcome this issue, do the following as a sender of the email.
Now it will get attached, and uploaded successfully. The receiver of the email should uncompress the attachment and rename it again with exe extension.
Gmail provides feature to import the contacts from Yahoo, Orkut and Outlook. You can also import contacts from CSV file.
Your CSV file should be formatted as a table and must include a header that defines the fields in your table. Gmail accepts many common header fields (Firstname, Lastname, email address, Phone etc.)

Fig: Import contacts to Gmail
You can also select the contact-group to which you want to add the imported contacts.
You can group the list of email addresses into a single entity.
When you want to send mails to a group, in the To field of the compose box, type the few letters of group name, auto-complete feature will suggest list of group names that matched your word. You can choose from the list and sending mail to the groups.
You could be having multiple Gmail accounts for various reasons. But it becomes tedious while checking mail that, you would want to logout and login to each account and check mails in different accounts. This can be done easily, by forwarding all mails from all accounts to a single account.
Follow the steps below to send emails from other accounts. i.e From x@gmail.com, you can send emails as y@gmail.com
If you are suspecting somebody else is accessing and hacking into your Gmail account, Gmail provides ‘Last Account Activity’ feature that shows five recent activities in your Gmail account.
Recent activity information includes, Access Type (Browser or from some mobile device etc), IP address from which the access was made and Date/Time of access.

Fig: Gmail multiple login information
If your Gmail account is currently being accessed from other location, ‘Last Account Activity Detail’ will show the details of other access in ‘Concurrent Session Information’ Table.
You can even sign-out all the other sessions except current session by clicking ‘Sign out all other sessions’
You can select any one of the available Gmail themes as explained below.

Fig: Choose Gmail themes
Since you get huge storage space with Gmail, you don’t need to delete any emails. Instead get into the practice of archiving every single email.
You can experience Gmail in your native language.
You can also send message in yours/recipients favorite language, by clicking down arrow and selecting language, in format bar of the compose box.
Note: You can still set your default Gmail Display Language as English and send emails in other languages from the email compose window.
There are several ways in following a blog such as subscribing to it by mail, or using an RSS reader, or following it by twitter and so on. But this is another interesting way to find out what is happening in one of your favorite blog.
Gmail Web clipping will be displayed in the thin strip that is right above the email listings. i.e above the ‘Archive’ button.

Fig: Setup web clips inside Gmail
In this article let us review 15 awesome Gmail tips and tricks that will help you to manage your emails effectively.
1. Attachment Alerter: Never Forget an Attachment
“Oops, I forgot the attachment in my previous email. Here it is” — I’m sure you would’ve either sent an email with this message to somebody (or) received an email with this message from somebody. When you are sending emails in a hurry you may forget to send attachments. It will look unprofessional when you are sending a very important business related email and forgot the attachment.The cure is Gmail’s Attach Alerter. If you have the word ‘attach’ in the mail content, and did not attach anything, you will be alerted by Gmail before sending that email. To enable this feature, do the following.
Fig: Gmail Attachment Reminder
- Click on “Settings” link,
- Click on “Labs” tab,
- Select “Enable” option button in “Forgotten Attachment Detector”
- Click on “Save Changes” at the bottom
Attachment Tip: Attach before composing
It is good idea to attach the file before start typing the message. This way Gmail will be uploading the file when you are typing the email. When you are done with your email typing, the attachment is already uploaded and you can send the email immediately.Attachment Tip: Attaching multiple file names
You can attach multiple files in Gmail by selecting the multiple files in your file browser by holding shift or control key for contiguous or different files.2. Forwarding All Emails Automatically
If you wanted to forward all emails to another account you can do the following.- Click on Settings link
- Click on Forwarding and POP/IMAP tab
- Click on the radio button “Forward a copy of incoming mail to”, and then give an email id in the text box.
Fig: Setup email automatic forwarding
You also have the option of deciding what to do with the emails in the original account after forwarding it. Following are the three options available.
- Keep Gmail’s copy in the inbox
- Archive Gmail’s copy
- Delete Gmail’s copy
3. Forwarding Selective Emails Automatically Using Filter
If you don’t want to forward all the mails, then you can forward particular mails by creating filter.- Click on “Settings” link
- Click on “Forwarding and POP/IMAP” tab
- Click on “Create a new filter”
- Set the filter criteria (for example, emails only from John Smith), and in the next step specify the email id to where the mail should be forwarded.
4. Emails Folders? — What is it? Use Labels Instead
The days or organizing the emails using folders are over. I still remember the good old days when I was having at least 50 folders in my yahoo and hotmail account. I’ll organize the folders based on projects, people etc.Not having to organize emails in a folder is a total freedom. Labels are like tags. You can create multiple labels and attach it to emails. Later it becomes easier for you to retrieve emails. If you are used to delicious bookmarking, you’ll have no problem using the Gmail labels effectively.
Creating Labels
- Click on “Settings”
- Enter label name in “Label” part and Click on “Create”
- Created Labels will be listed in your labels list. i.e Right below the ‘Spam’ folder on the top right side.
Fig: Use Gmail Labels to organize emails
Assigning Labels to an Email
- Select the email message or conversation
- Drag and drop it to the particular label to which you want to move. When moving you will see a tip message like “Moving 1 Conversation”.
- (or) You can also select the message using the check-box in front of it and click on Labels drop-down list on the top and select multiple labels using the check-box.
5. Searching in Gmail
Since search and indexing is the core business of Google, there is no surprise that Gmail’s search feature works like a charm. The search will bring you the relevant email very fast every single time.Search All Emails
Entering search word in Gmail search box will search for all the messages including chat messages, emails in sent, drafts, inbox and all the messages that are archived and labeled.Searching Emails in Particular Folders
“Searchtext in:foldername” will search for the given text in the specific folder which you specified. For example, following will search for keyword geek in the Sent Folder.geek in:sent
Search Specific Type of Messages
Types of messages in Gmail
- Starred - messages which are Considered as an important
- Unread - messages which are unread
- read - messages which are read
- chat - Conversation messages
“is:starred”, “is:unread”, “is:read” and “is:chat” will search for the messages that are starred, unread, read and chat messages respectively.
For Example, the following will give you the list of starred messages in Inbox folder.
in:inbox is:starred
Use OR Operator
You can search messages based on either-or condition. For example, following search gives the message which has ramesh as recipient or sender, after 2009/01/01
from:ramesh OR to:ramesh after:2009/01/01
from:ramesh | to:ramesh after:2009/01/01
Note: OR is case sensitive and must be in upper case.
Advanced Gmail Search
You can also use advanced options in search by clicking ‘Show search option’ that is located next to the Gmail search box. Advanced search provides search based on the following:
- from – specify sender
- to – specify recipient
- subject – search words in subject
- Folder – Folder to search
- Include and Exclude the search words
- Message has/hasn’t attachment
- Age of the message
6. Turn-Off or Turn-On Search Highlighting
By Default, Gmail highlights the searched words in search results. i.e When you do a search, Gmail returns a list of messages matching the search criteria. You can select any of these messages to view, and Gmail automatically highlights the word/words you searched for.
Fig: Gmail turn on or off highlighting
Sometimes, you might feel it’s distracting. You have the ability to turn OFF/ON the highlighting by clicking on the “Turn off Highlighting” link on the top right column. Clicking it again turns highlighting back immediately without reloading the page.
7. How to Attach an Executable (exe file) in Gmail
You cannot attach an executable file like a normal file. Gmail will display the error message – “FILE is an executable file. For security reasons, Gmail does not allow you to send this type of file”.
To overcome this issue, do the following as a sender of the email.
- Rename the file without an exe extension,
- Compress it with any compression utility and then attach it.
Now it will get attached, and uploaded successfully. The receiver of the email should uncompress the attachment and rename it again with exe extension.
8. Import Your Contacts
Gmail provides feature to import the contacts from Yahoo, Orkut and Outlook. You can also import contacts from CSV file.
How to Import Contact from Custom CSV
Your CSV file should be formatted as a table and must include a header that defines the fields in your table. Gmail accepts many common header fields (Firstname, Lastname, email address, Phone etc.)
Fig: Import contacts to Gmail
- Click on “Contacts” link
- Click on “Import” tab,
- Browse the CSV file which you want to import
- Click on “Import”
You can also select the contact-group to which you want to add the imported contacts.
9. Sending emails to Group / Alias
You can group the list of email addresses into a single entity.
- Click on “Contacts” link,
- Click on “+icon” (New Group) and give a name to the New group.
- Now you can add new contact to this group or you can move the existing contact to this group.
When you want to send mails to a group, in the To field of the compose box, type the few letters of group name, auto-complete feature will suggest list of group names that matched your word. You can choose from the list and sending mail to the groups.
10. Managing Multiple Gmail Accounts
Checking all emails
You could be having multiple Gmail accounts for various reasons. But it becomes tedious while checking mail that, you would want to logout and login to each account and check mails in different accounts. This can be done easily, by forwarding all mails from all accounts to a single account.
Sending emails as another Gmail account
Follow the steps below to send emails from other accounts. i.e From x@gmail.com, you can send emails as y@gmail.com
- Login to x@gmail.com, go to Settings -> Accounts Tab -> “Send Email As” Section.
- Add y@gmail.com account here and confirm that this is your email by following the instruction.
- Now you can start sending emails as y@gmail.com from x@gmail.com.
11. Last Login Details for Security Purpose
If you are suspecting somebody else is accessing and hacking into your Gmail account, Gmail provides ‘Last Account Activity’ feature that shows five recent activities in your Gmail account.
- Click on ‘Details’ link in Last account activity line at the bottom of your Gmail page.
Recent activity information includes, Access Type (Browser or from some mobile device etc), IP address from which the access was made and Date/Time of access.
Fig: Gmail multiple login information
If your Gmail account is currently being accessed from other location, ‘Last Account Activity Detail’ will show the details of other access in ‘Concurrent Session Information’ Table.
You can even sign-out all the other sessions except current session by clicking ‘Sign out all other sessions’
12. Change Gmail Look and Feel Using Themes
You can select any one of the available Gmail themes as explained below.
- Click on “Settings” link.
- Click on “Themes” tab.
- Click on the various available themes. (or) you can create custom theme.
- Select the Country and City name to customize your theme. Some themes change during day, and based on local sunrise, sunset or based on weather.
Fig: Choose Gmail themes
13. Forget the Delete Key — Archive Your Emails
Since you get huge storage space with Gmail, you don’t need to delete any emails. Instead get into the practice of archiving every single email.
14. Gmail Display Language
You can experience Gmail in your native language.
- Click on “Settings” link,
- Choose your favorite language in “Gmail Display Language”
- Select “Save Changes” button.
- This will display Gmail in your native language.
You can also send message in yours/recipients favorite language, by clicking down arrow and selecting language, in format bar of the compose box.
Note: You can still set your default Gmail Display Language as English and send emails in other languages from the email compose window.
15. View Your Favorite Blog Post Title in Random
There are several ways in following a blog such as subscribing to it by mail, or using an RSS reader, or following it by twitter and so on. But this is another interesting way to find out what is happening in one of your favorite blog.
Gmail Web clipping will be displayed in the thin strip that is right above the email listings. i.e above the ‘Archive’ button.
Fig: Setup web clips inside Gmail
- Click on ‘Settings”
- Select the ‘Web Clips’ tab
- Enter your blog URL in the ‘Search by topic or URL’. For example, enter: http://www.thegeekstuff.com
- It will automatically identify the feedproxy URL for the blog and display the last few posts from the blog with an ‘Add’ button.
- Click on the Add button, which will start displaying the blog posts in the Web Clipping area of the email.
Source:- www.thegeekstuff.com


 D
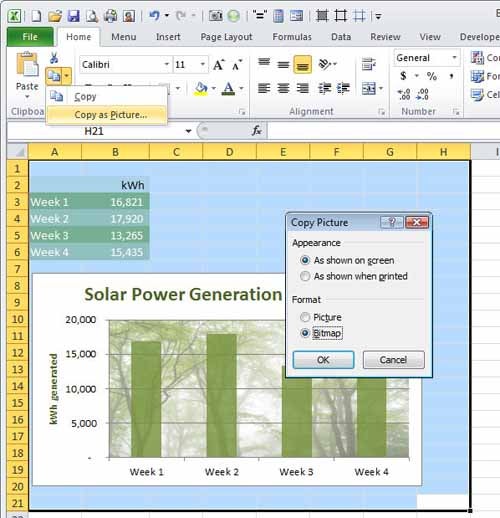
D You can add a logo or header to an Excel chart printout in a few simple steps.You can easily add your company logo or other image to the header of an Excel worksheet so that it prints on every page of the sheet. To do this, choose Insert, Header & Footer and then click one of the boxes at the top of the sheet. Click the Picture button, and choose an image to insert.
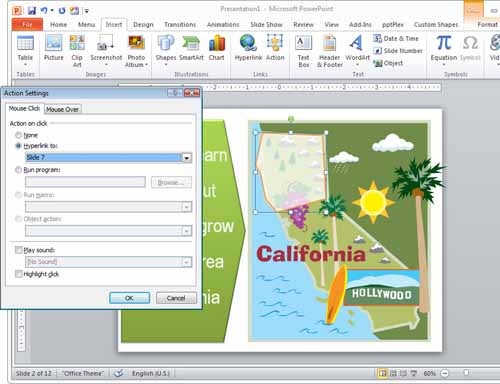
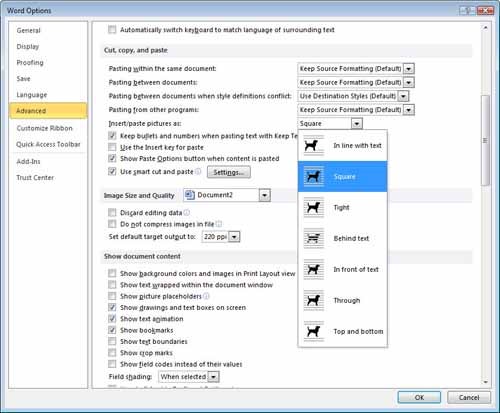
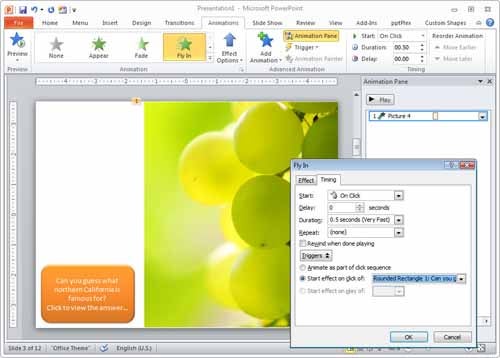 An animation in PowerPoint can keep your presentation lively.To create a simple animation in PowerPoint, first add a shape and a picture to a slide. SelectAnimations, click the picture, and then click an option such as Fly In.